Understanding Neon’s object hierarchy
Learn what Projects, branches and compute endpoints are. This will help you develop the right mental model when working with Neon.

To use Neon to its full potential, it is important to understand its object hierarchy. Before diving in, we will first go over the experience of provisioning a managed Postgres instance and why it was necessary to introduce a new architecture to make Postgres cloud-native.
Traditional managed Postgres
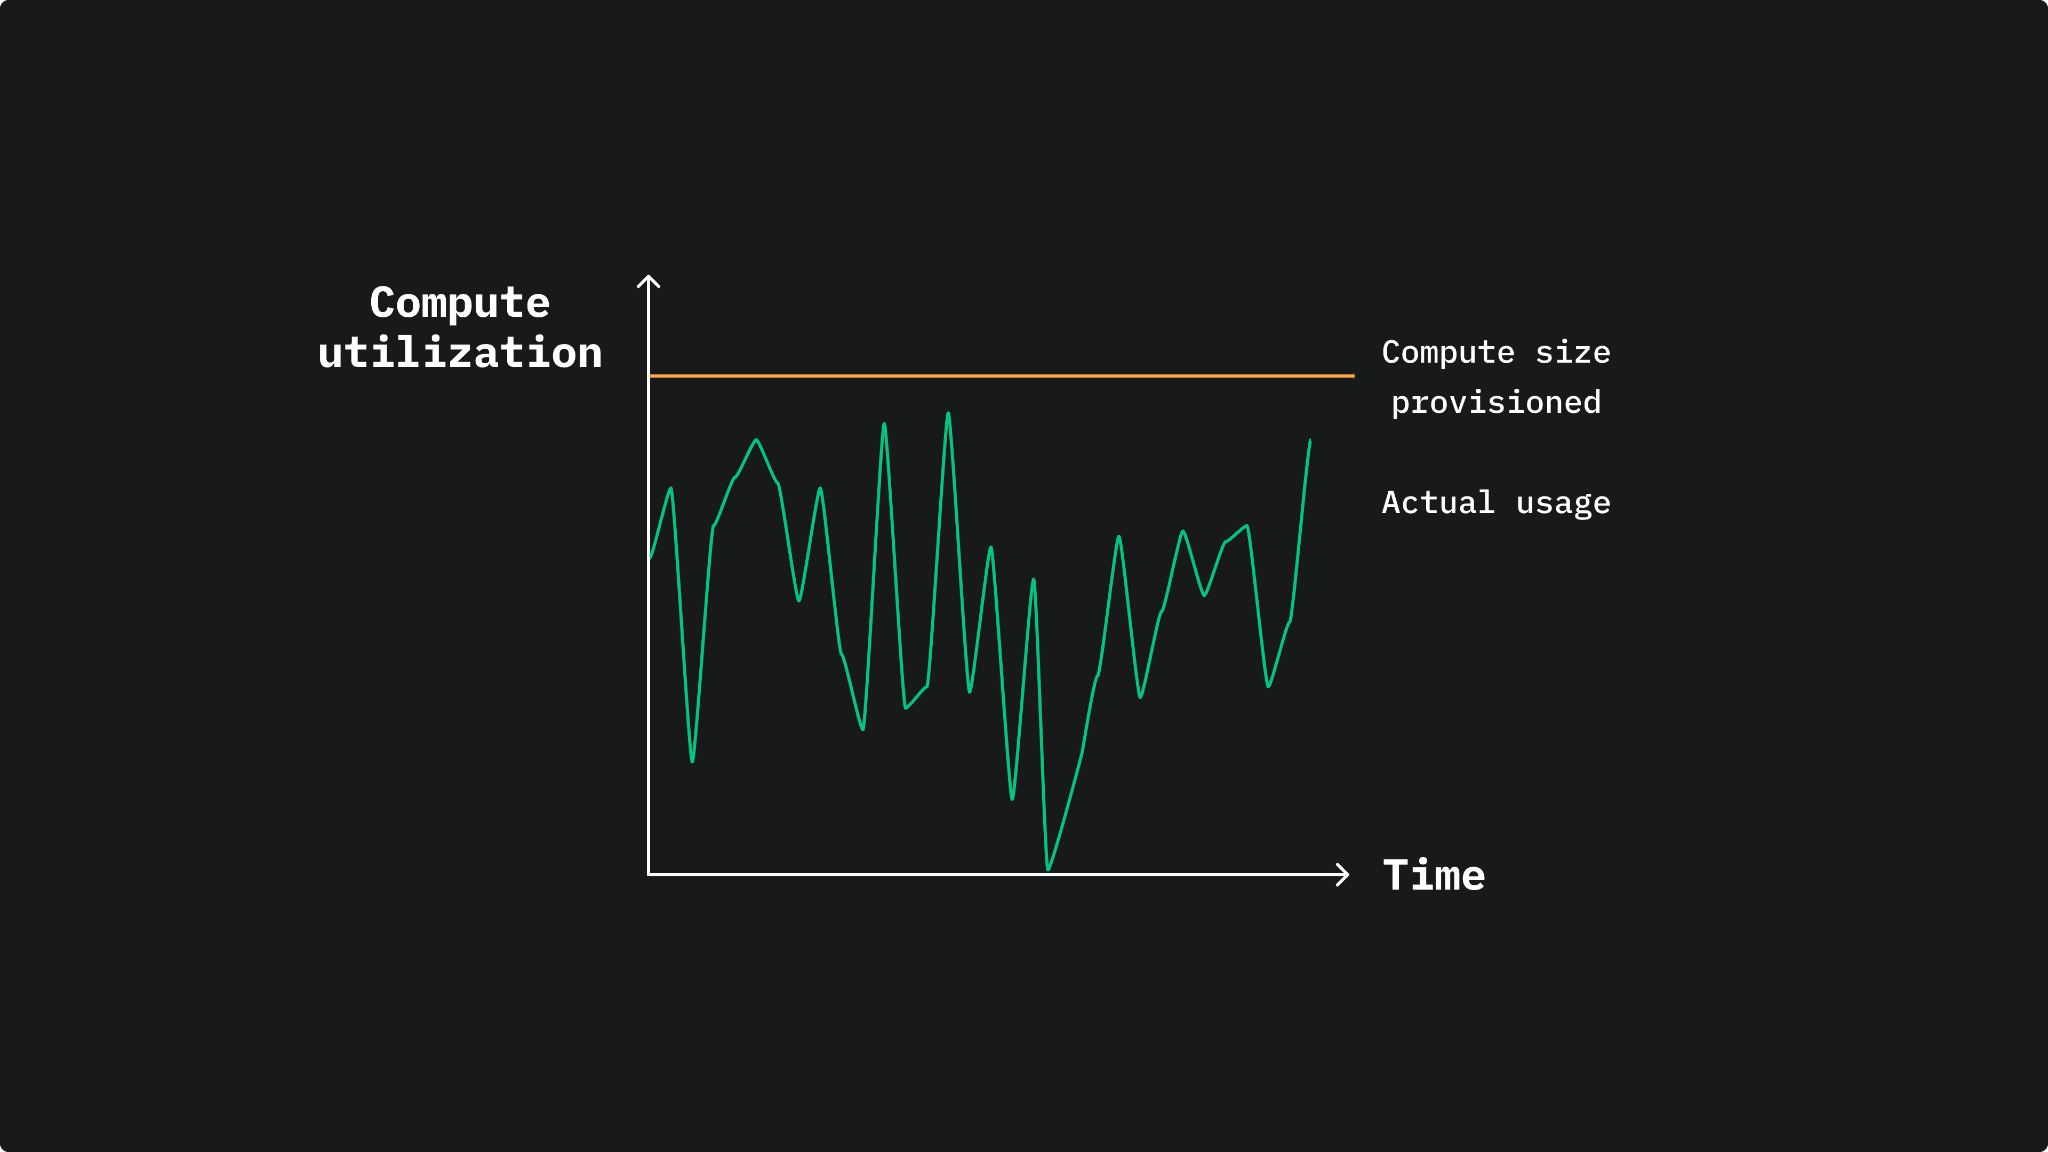
When provisioning a managed Postgres instance, you typically pick a size for your database upfront and specify how many resources you will need (CPU, memory, and storage). The drawback is you most likely overestimate how much you need and end up overpaying for unused resources. Additionally, if your application has spiky traffic or long periods of inactivity (e.g., on weekends), you overpay for a large instance.
SQL databases were not designed to take advantage of modern cloud infrastructure, where you can provision resources based on demand. This is due to its monolithic architecture where compute (CPU + memory) and storage are co-located. If you need more resources, whether storage or compute, you will either upgrade to a more powerful instance (scale vertically) or add more machines (scale horizontally).
This limitation led to the introduction of a new database architecture that takes advantage of modern cloud infrastructure: the separation of storage and compute. This architectural design unlocks many benefits since it enables:
- Running multiple compute instances without having multiple copies of the data.
- Performing a fast startup and shutdown of compute instances.
- Scaling CPU and I/O resources independently.
Since storage is separate, you can replace the regular filesystem with a custom, decentralized, storage layer. This makes it easier to simplify operations, like backups and archiving, which can be handled by the storage layer without impacting the application.
Neon follows this architecture while being fully compatible with Postgres. For a deep dive into the open-source version of Neon, check out architecture decisions in Neon and deep dive into the Neon storage engine.
The Neon console’s object hierarchy
Neon is a fully managed serverless Postgres. This means you do not have to pick a size for your database upfront, and it will automatically allocate resources to meet your database’s workload. In addition to serverless Postgres, Neon enables unique workflows that improve developer productivity. To leverage these workflows, the first step is to understand the Neon console’s object hierarchy. Here is a high-level overview of the most important objects you should know.
Projects
The first thing you will do in Neon after signing up is create a project. You can think of a project as a container for the different resources you can create. If you are working on different applications, it makes sense for you to create a project for each one.
To create a project, you pick a Postgres version, select a region, and specify the compute size.
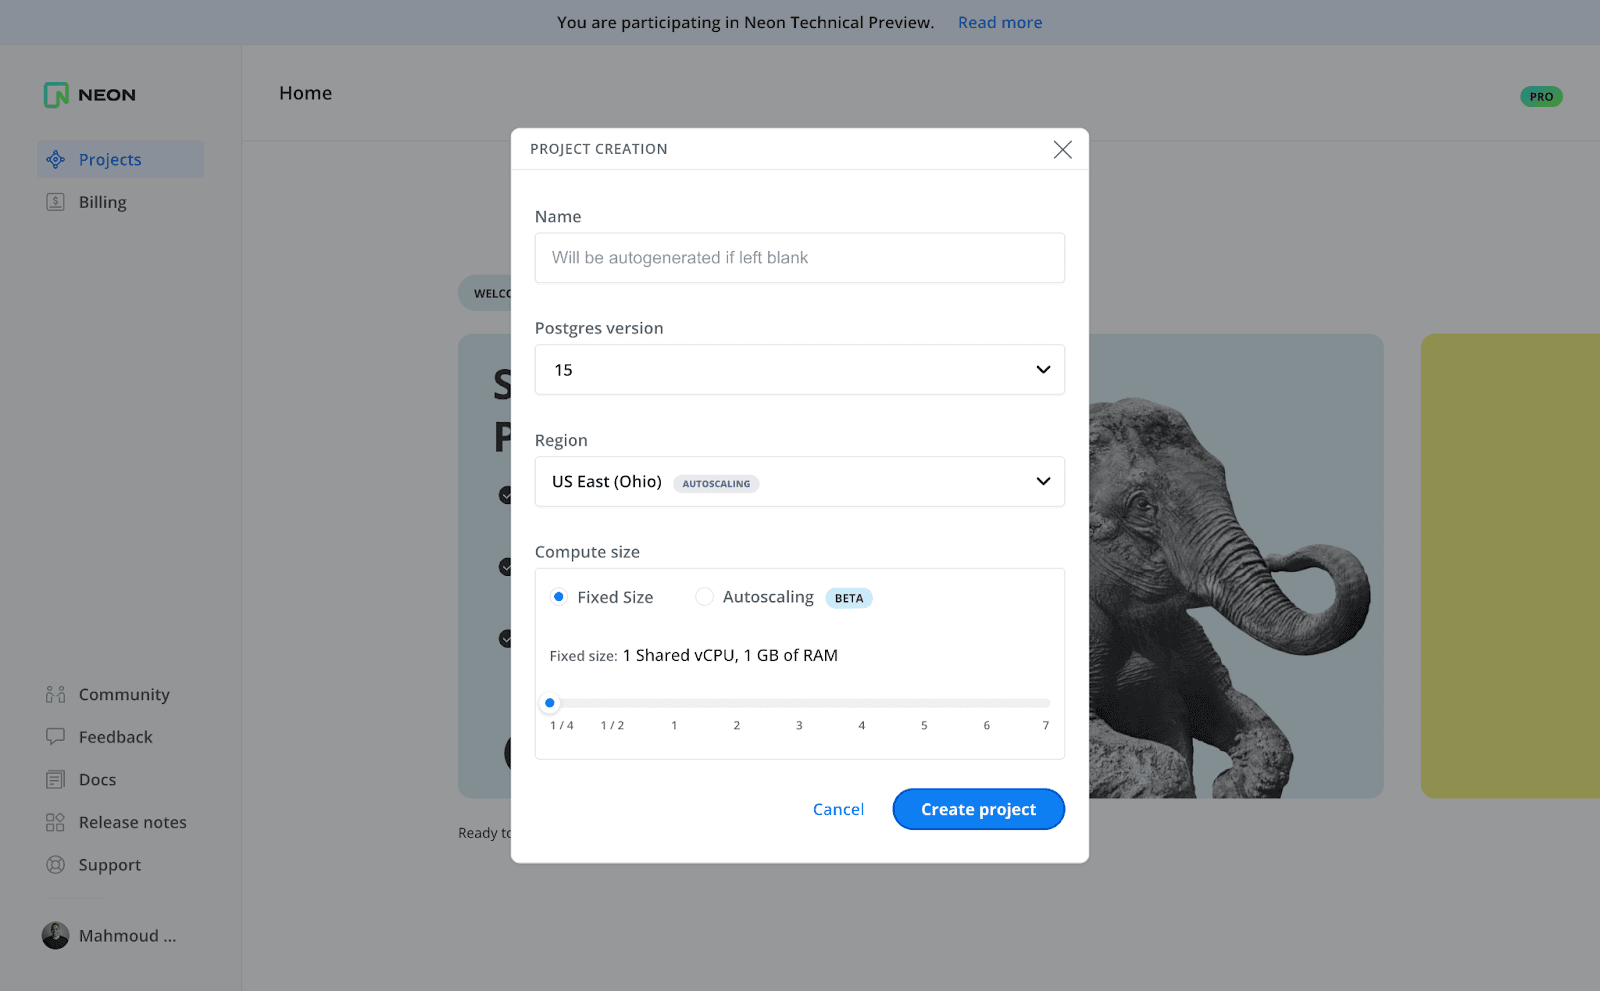
After you click “Create project”, you are immediately presented with a database connection string for a database you can connect to and use.
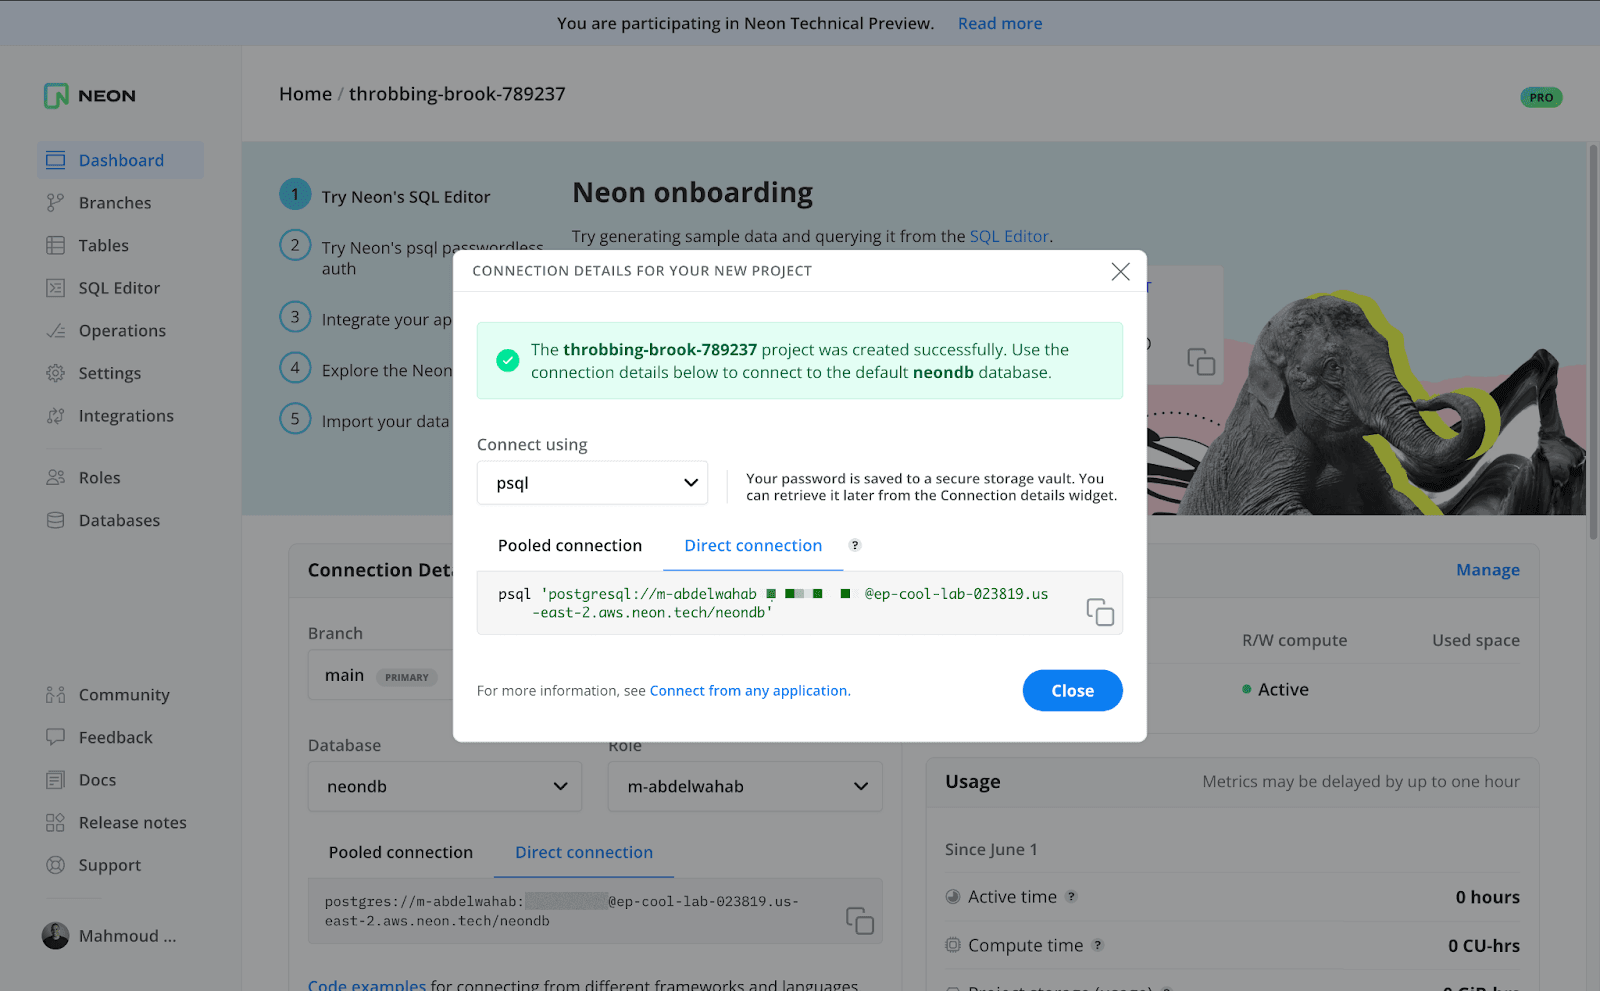
Under the hood, Neon has created a Postgres cluster that contains a default database called “neondb”. Within this Postgres cluster, you can create as many databases as you need.
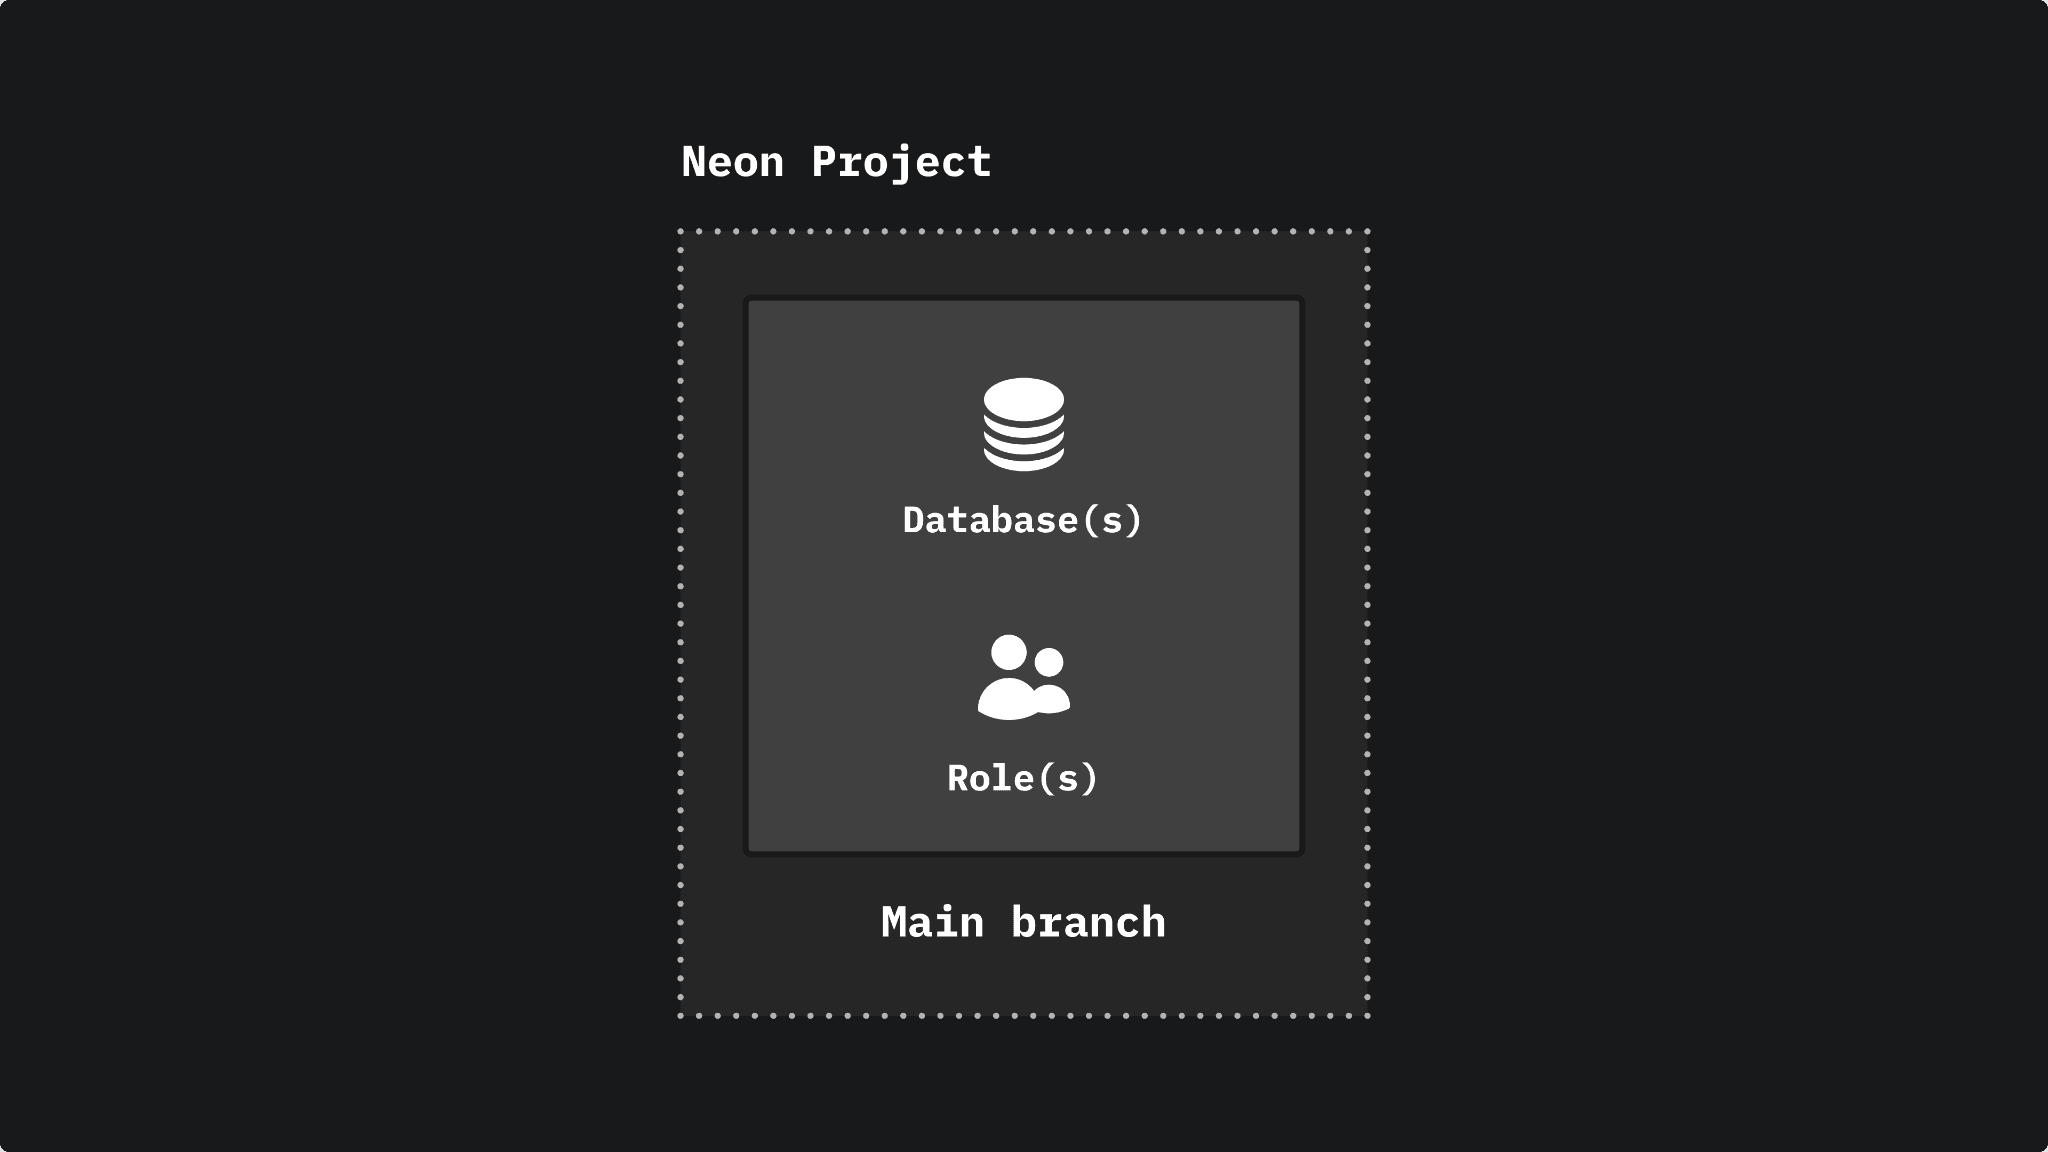
While this is already useful, two additional Neon-specific objects that reside within a project unlock many possibilities: branches and compute endpoints.
Branch
Neon enables you to instantly branch your data the same way you branch your code.
You can create a branch from a current or past state. For example, you can create a branch that includes all data (this includes databases, roles, extensions, schema, data, etc.) up to the current point in time or an earlier point in time.
Each branch is completely isolated from its parent, so you can modify it or delete it when it’s no longer needed. Branching uses the copy-on-write technique for data, making it a fast and cost-effective process.
The default Postgres cluster created when you create a project is represented by a branch called “main”.
Compute endpoint
To connect to a database that resides in a branch, you do so via a unique compute endpoint.
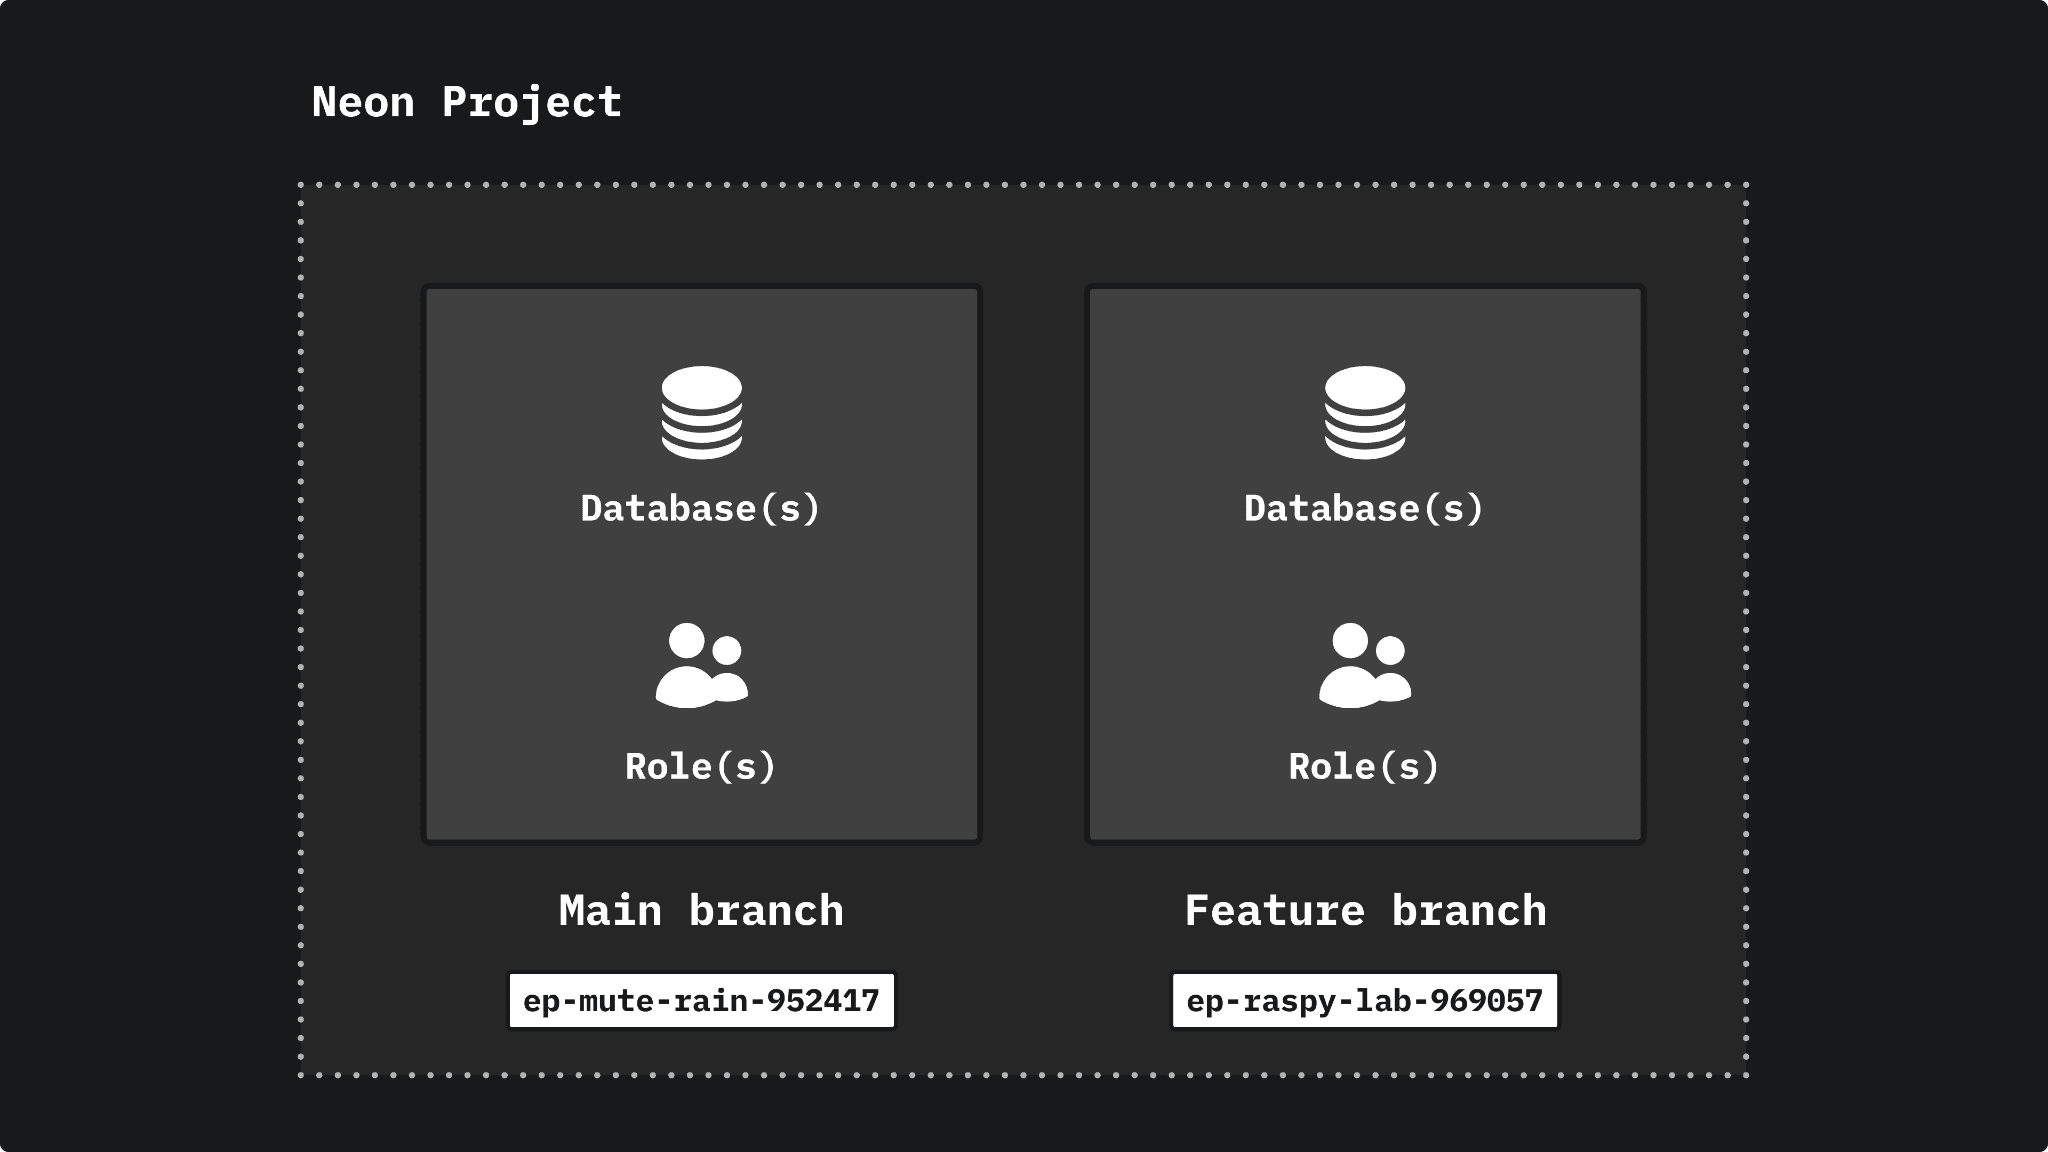
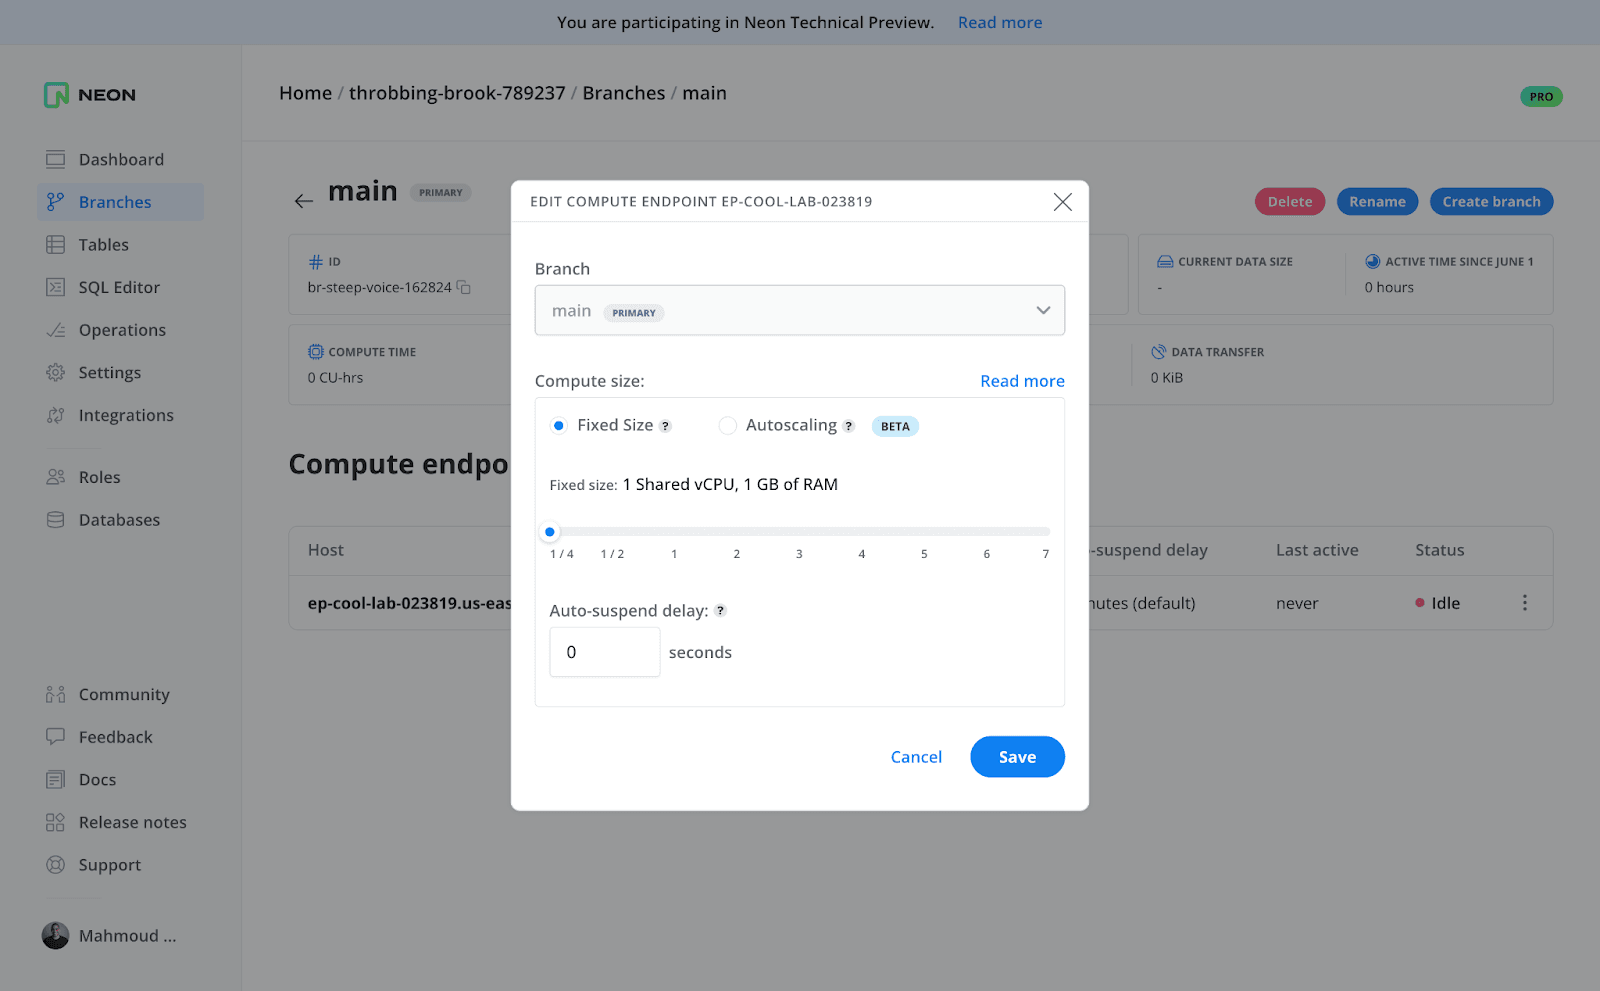
A compute endpoint is read-write by default and can be configured to either have a fixed size or automatically scale up and down based on your workload. If you pick “Autoscaling”, you can specify a minimum and a maximum size for your compute endpoint. This way, you can forecast the maximum amount you will spend, assuming that the compute endpoint is running 24/7 (so 730 hours per month)
Note: as of the time of writing, a branch can only have one compute endpoint. However, when we introduce read replicas, a branch will be able to have many compute endpoints, where each one has a different location.
Conclusion
In this guide, you learned about Neon’s architecture and how it differs from a traditionally managed Postgres instance. You also learned about Neon’s object hierarchy.
If you have any questions, please reach out to us in our community forum, and if this is the first time you hear about Neon, you can sign up for free.
